 airbrakecompressor
Verifying air compressor fitment before you buy comes down to six checks: the OE number on the unit you are removing, the mounting flange and bolt pattern, the drive method, the port layout and thread type, the displacement rating, and the coolant, oil and inlet connections. Match all six and the replacement bolts on and charges the system normally. Miss one and the compressor comes back off with the truck still down, usually after the return window has already been complicated by a mounting bolt scratch.
Remember what you are buying. A truck air compressor is a pneumatic pump driven off the engine, not a hydraulic component, so fitment is an engine-side question first and a brake-side question second. Two trucks with identical brake systems can take completely different compressors because they were built with different engines, different accessory drives or different model-year running changes.
The six fitment checks at a glance
| Check | What to compare | Typical mismatch |
|---|---|---|
| Identification | Tag number, casting number, OE number, engine serial | Right truck model, wrong engine build |
| Mounting | Bolt count, hole spacing, pilot diameter, flange thickness | Two-bolt versus four-bolt flange, wrong pilot register |
| Drive | Gear, spline or keyed shaft, pulley, gear supplied or reused | Correct body with the wrong shaft end |
| Ports | Discharge, inlet, unloader, coolant, oil; thread standard and head clocking | NPT versus metric, ports facing the wrong way |
| Capacity | Displacement or CFM at governed engine speed | Downsized pump, long duty cycle, oil carryover |
| Services | Water-cooled or air-cooled, engine-lubricated or self-contained | No coolant ports on a head the truck plumbs coolant to |
1. Start with the number on the unit you are removing
The part number stamped or tagged on the old compressor outranks every other piece of information you have. Truck year and model alone are not enough, because a fleet of identically specced tractors can carry two or three compressor variants depending on build date. Photograph the tag, the casting numbers on the crankcase and head, and any stamped OE number before the unit goes in the core box. If the tag is unreadable, work from the engine serial number and the vehicle build record instead of guessing. Our guide on how to read an air compressor part number covers what the digit groups usually tell you.
With a number in hand, cross-reference it rather than assuming it is unique to one supplier. The same pump is often listed under an OE brand number, an engine maker number and a truck maker number, and a good catalog will show all three. Compare your number against a manufacturer listing such as the VADEN air brake compressor catalog, and against our cross reference by engine if you only have the engine data.
2. Mounting flange and bolt pattern
Measure, do not eyeball. Count the mounting bolts, measure the hole spacing centre to centre, and measure the pilot or register diameter that locates the compressor in the accessory drive housing. Note flange thickness as well, because a thicker flange changes bolt grip length and can leave you short of thread engagement with the original bolts. Check the gasket or O-ring style at the same time and confirm whether one ships with the compressor.
Also look at clearance, not just the bolt holes. On tight installations the crankcase, the head or the governor can foul a coolant hose, a turbo pipe or a frame-side bracket, even when the flange is correct. If the replacement has a differently shaped body than the original, ask about clearance before you buy.
3. Drive type and shaft detail
A compressor with the right flange can still have the wrong shaft. Gear-driven units may use a splined shaft, a keyed taper with a retaining nut, or a bolt-on gear flange, and the spline count and taper are not interchangeable between families. Belt-driven units bring their own questions: pulley diameter, groove count and belt profile all have to match the existing drive. Confirm whether the drive gear or pulley is included or whether you are transferring the original, and whether the mounting hardware and nut are supplied. Our comparison of gear-driven versus belt-driven compressors explains why the two setups are specced differently.
4. Port layout, threads and head clocking
List every line you disconnect: discharge, inlet, unloader or governor signal, coolant in and out, oil feed and oil return where fitted. Then confirm the replacement has all of them, in usable positions, with matching threads. Thread standard is a common trap. North American builds usually run NPT discharge and inlet ports, commonly in the half-inch to three-quarter-inch range, while European-spec engines frequently use metric or O-ring boss fittings. Adapters exist, but stacking adapters on a hot discharge line adds leak paths and restriction.
Head clocking matters just as much. Some compressors are offered with the head rotated to different positions so the discharge exits toward the correct side of the engine. A correctly numbered pump with the head clocked the wrong way will force the discharge line into a bend it was never meant to take.
5. Displacement and duty cycle
Do not downsize. Displacement, usually expressed as CFM at a stated engine speed, has to match or exceed the original. Single-cylinder units commonly sit in the range of roughly 7 to 15 CFM and twin-cylinder units roughly 15 to 35 CFM, but the number on the original spec is what you match, not the category. An undersized pump has to run longer to bring the system from a governor cut-in around 100 to 110 psi back up to cut-out around 120 to 135 psi, which is how a properly charged system holds near 120 psi. Longer running time means a higher duty cycle, more heat, more oil carried past the rings and faster carbon buildup in the discharge line. A widely used industry guideline is to keep the compressor loaded no more than about a quarter of the time in service.
If the old unit was struggling, work out why before you size the new one. Air leaks, a tired air dryer or added air-consuming accessories can all make a correctly sized compressor look too small.
6. Cooling, lubrication and inlet supply
Confirm whether the truck plumbs coolant to the compressor head and whether the replacement has those ports. Confirm the lubrication arrangement as well: most heavy-duty units are pressure-fed from the engine oil system through an external line, while some are self-contained. Finally, check where induction air comes from. Some compressors draw through a line from the engine air cleaner, others carry their own inlet filter, and swapping between the two without changing the plumbing leaves you either sucking unfiltered air or blocking the inlet.
Confirm the control side before you order
Ask where the governor lives. On many units it bolts directly to the compressor head, so a replacement without that mounting pad leaves you needing a remote mount and extra plumbing. Check the unloader arrangement too, since inline and plunger-style unloaders take their signal at different points. Decide up front whether the governor, unloader kit, gaskets, mounting bolts and drive gear come with the compressor or need to be ordered alongside it.
Before the old unit leaves the shop, bag the drive gear nut, the mounting bolts and the fittings, and label them. Half the fitment surprises during install are hardware, not the pump itself.
Final pre-purchase checklist
- OE or tag number recorded and cross-referenced, with engine serial as backup
- Bolt count, hole spacing and pilot diameter measured
- Shaft or pulley type confirmed, and gear supply confirmed
- Every port accounted for, thread standard and head clocking checked
- Displacement equal to or greater than original
- Coolant, oil and inlet arrangement matched
- Governor and unloader mounting and included parts confirmed
- Return policy and core terms understood before the box is opened
Five minutes with a tape measure and a camera before you order saves a wasted bay day. Once the correct unit is on the bench, follow the torque sequence and break-in advice from the supplier, and verify governor cut-in and cut-out on the gauge before the truck leaves.
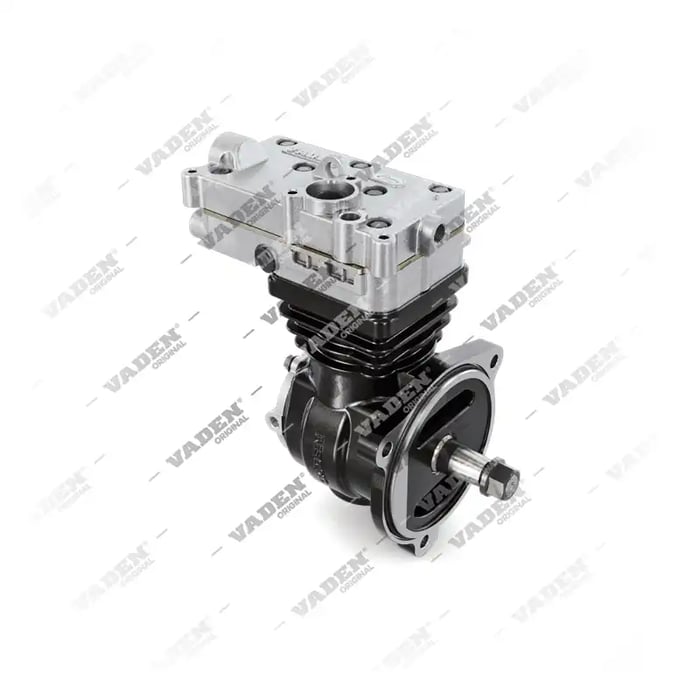
Need the part, not just the answer?
OE-grade air brake compressors and repair kits, manufactured and tested to commercial-vehicle standards.
Shop VADEN partsPublished by VADEN Original. Product links point to the manufacturer’s official catalogue. Specifications are general — always confirm figures against your vehicle’s service manual.