 airbrakecompressor
When an air brake compressor fails, it almost never fails cleanly. Worn rings, a cracked valve plate or a scored bore push engine oil, carbon and often metal debris straight down the discharge line into the air dryer, the supply (wet) tank and every valve fed from it. Bolting a new compressor onto that contaminated system is the most common reason a replacement unit gets blamed for failing a few weeks later — the flush is not housekeeping, it is part of the repair.
What actually gets into the system
On heavy-duty trucks the compressor is lubricated by engine oil and, on most units, cooled by engine coolant. When the rings or the cylinder bore give up, oil is carried past the pistons as a hot mist and pushed downstream with the charge air. It cools, condenses, varnishes the inside of the discharge line and saturates the desiccant bed in the air dryer. Once that desiccant is oil-coated it stops adsorbing moisture, so water follows the oil into the tanks and the problem compounds.
Mechanical failures add solids: fragments of piston ring, reed or valve plate material, gasket debris, aluminium swarf. Those travel until something catches them — usually a check valve seat, the dryer inlet, or a relay valve port, where a chip holds a seat open and creates a leak that no amount of adjustment will cure.
Oil is the more insidious of the two, because nitrile rubber does not tolerate it. Diaphragms, o-rings and valve seats swell, soften and lose shape. The symptoms appear later as sluggish application and release, weeping exhaust ports, and valves that pass air when they should seal. If you are not yet certain the compressor is the source, work through why an air compressor pumps oil first — a dryer that never purges will also fill tanks with oily sludge.
Replace, clean, or leave alone
| Component | Typical contamination | Action |
|---|---|---|
| Discharge line | Coked carbon, oil varnish, restriction | Replace. Never torch, wire-brush or blow through and reuse |
| Air dryer cartridge | Oil-saturated desiccant, collapsed bed | Replace — oil-fouled desiccant cannot be regenerated |
| Air dryer body and purge valve | Sludge, sticking purge piston, fouled check valve | Strip and clean, or replace if heavily contaminated |
| Governor and its supply line | Oil and carbon in ports and around the piston | Clean or rebuild, then reset cut-in and cut-out |
| Supply (wet) tank | Oil sludge and water in the bottom | Remove, flush, dry; renew the drain valve |
| Primary and secondary tanks | Oil carryover if the dryer was already passing | Drain and inspect; flush if oil is present |
| Check valves | Gummed or chip-held seats | Inspect; replace rather than clean |
| Relay, foot and quick-release valves | Swollen o-rings, oil at exhaust ports | Inspect; rebuild or replace where oil has reached |
| Brake chambers | Oil film and softened diaphragms | Inspect diaphragms; replace any that are swollen or tacky |
| Nylon tubing to accessories | Oil absorbed into the tube wall | Replace oil-soaked runs — they keep bleeding oil back out |
The flush procedure
Work with the engine off, the wheels chocked and the system fully drained. Remember that the spring brakes set as system pressure falls through roughly 20 to 45 psi, so chock first and do not rely on the parking brake alone once you start opening lines.
- Drain every reservoir to zero, starting with the supply tank, and keep the drain water — oil content tells you how far contamination travelled.
- Remove and discard the discharge line. Inspect the compressor discharge port and the dryer inlet fitting for hard carbon; carbon here means the line was running hot and restricted, which is covered in more detail under discharge line carbon buildup.
- Remove the failed compressor. Check the drive gear or coupling, the oil feed and return, and the coolant ports for debris before anything new goes on.
- Service the air dryer. Fit a new cartridge and inspect the purge valve, the check valve and the heater; see air dryer cartridge replacement for the sequence.
- Remove the supply tank, flush it with a solvent approved by the tank manufacturer, then dry it thoroughly with clean, dry shop air. No residue, no standing water.
- Replace or blow through the lines between compressor, dryer and supply tank. Anything oil-soaked gets replaced, not cleaned.
- Clean or rebuild the governor and check its signal line. A governor full of varnish will hunt or hold the compressor loaded.
- Work downstream one circuit at a time. Crack fittings at relay valves and chambers looking for oil; where you find it, that valve gets inspected internally.
- Fit the new compressor with new gaskets and a new discharge line. Route the line with a continuous fall toward the dryer, no low loops that trap condensate, and keep it long enough to shed heat — most manufacturers want the air entering the dryer below roughly 300°F (150°C).
- Prime the oil feed as the compressor manufacturer specifies before cranking.
Do not pressurise the system to "blow the debris out." All that does is drive contamination deeper into valves you have not yet opened.
Rebuilding instead of replacing
If the compressor itself is worth saving — the bore is serviceable and the failure was confined to valves, unloaders or gaskets — the same flush discipline applies to the rest of the system. Use a matched set of seals, unloader components and gaskets rather than mixing salvage parts; OE-grade air brake compressor repair kits keep the wear items consistent so you are not chasing a second failure. Cross-reference by the original Bendix, Wabco, Knorr-Bremse or engine-maker part number stamped on the housing rather than by eye.
Charging up and proving the repair
Start the engine and watch the system build. The standard check is 85 to 100 psi in 45 seconds or less at governed rpm on a dual system; a slow build points to a restriction you missed or a leak you have not found. Confirm the governor unloads the compressor in the 120 to 135 psi band and reloads it around 100 to 110 psi, and that the dryer gives an audible purge each time it cuts out. A fully charged system normally sits near 120 psi.
Then do a static leak test with the engine off — first with the brakes released, then with the pedal held applied — and compare the drop against the limits for a single vehicle or a combination. Fan the pressure down and confirm the low-air warning light and buzzer come on at around 60 psi, and that the spring brakes set as pressure continues to fall through the 20 to 45 psi range.
Mistakes that cause a repeat failure
- Reusing the old discharge line because it "looked clear" — carbon reforms fast in a line that already ran hot.
- Leaving the original desiccant cartridge in place to save time.
- Ignoring oil-soaked nylon tubing feeding accessories, which slowly returns oil to the system.
- Not diagnosing why the first compressor died: a non-purging dryer, a restricted line, constant unloaded running, or a chronic leak that keeps the compressor loaded far beyond a healthy duty cycle.
- Skipping the follow-up. Drain the tanks after the first week in service; oil in the drain water means the flush did not go far enough.
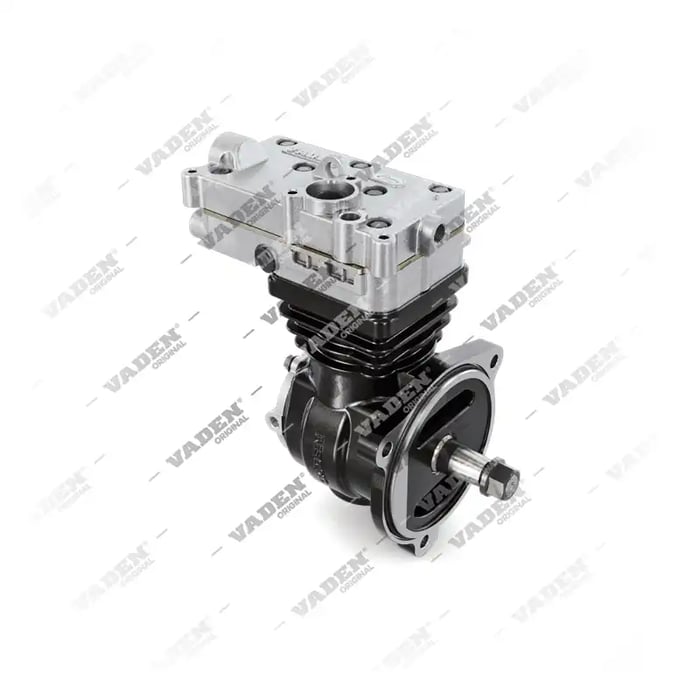
Need the part, not just the answer?
OE-grade air brake compressors and repair kits, manufactured and tested to commercial-vehicle standards.
Shop VADEN partsPublished by VADEN Original. Product links point to the manufacturer’s official catalogue. Specifications are general — always confirm figures against your vehicle’s service manual.